The experienced detectorists at Minelab have put together a comprehensive list of FAQs on how to use a metal detector. These also contain many pro tips for metal detecting.
You may find the answers to your questions by reading the FAQs here and from the related Knowledge Base Articles. Of course, if, after searching through this information you still have a question, there please contact our customer service team.
Sí, los detectores de metales Minelab tienen la capacidad de " discriminar " entre diferentes tipos de objetivos . La característica de discriminación en los detectores Minelab mide dos propiedades objetivo, propiedades ferrosas y propiedades conductoras .
Las propiedades ferrosas se refieren a la cantidad de hierro que hay en un blanco y, por lo tanto, a la fuerza con que se atrae un imán. Los objetivos ferrosos tienden a ser basura, por lo que el detector puede discriminarlos / enmascararlos solo por sus propiedades ferrosas. Las propiedades conductivas se refieren a qué tan bien un objetivo conduce la corriente eléctrica y, por lo tanto, responde al campo magnético de un detector de metales. La basura como las uñas y la lámina tienen diferentes propiedades conductoras para objetivos valiosos como monedas y anillos. En este caso, el detector de metales puede juzgar si el objetivo es basura en función de la conductividad.
El proceso para configurar los ajustes de discriminación y el método utilizado para indicar tesoros o basura varía en toda la gama de detectores Minelab.
Como regla general, cuanto más baja es la frecuencia utilizada por el detector, más profundo puede penetrar en el suelo. Sin embargo, a bajas frecuencias, se reduce la sensibilidad a pequeños objetivos de baja conductividad. Cuanto mayor sea la frecuencia, mayor será la sensibilidad a objetivos pequeños, pero no penetrará tan profundamente. En general, los detectores de oro operan a frecuencias más altas (para encontrar pepitas pequeñas), mientras que los detectores de monedas y tesoros funcionan a frecuencias más bajas para una penetración más profunda. La excepción a esto son los detectores de metales tipo MPS que son sensibles y que buscan a la vez.
tamaño
El tamaño de una bobina de búsqueda puede influir en la profundidad de detección o la sensibilidad de un detector de metales. Cuanto más grande sea la bobina, más profundo detectará, pero tendrá menos sensibilidad a los objetivos pequeños. Por el contrario, cuanto menor sea el diámetro de la bobina de búsqueda, más sensible se vuelve, pero pierde la profundidad de detección.
Las bobinas más pequeñas son más livianas, más fáciles de controlar y pueden ser elegidas por su capacidad para negociar terrenos difíciles o maleza. También son una ventaja en áreas de alta basura.
Forma
Las formas de bobina más comunes son las bobinas redondas sólidas convencionales, las bobinas con forma elíptica y las bobinas de banda abierta. La razón principal para el cambio de forma es cumplir con un requisito físico, es decir, una bobina elíptica puede empujarse alrededor de arbustos o entre rocas más fácilmente que una bobina redonda y bobinas de banda abierta que se mueven a través del agua más fácilmente y son más livianas. Las bobinas redondas convencionales a menudo son más estables y se desempeñan mejor y son particularmente populares para la prospección de oro.
Configuración
Los tres tipos más comunes de devanados de bobina son concéntrico, doble D y Monoloop. La diferencia entre estos tipos de bobinas es el patrón con el que se enrolla el cable dentro de la bobina de búsqueda.
Bobina concéntrica
Una bobina concéntrica tiene un círculo interno y un devanado de alambre del círculo externo. Su patrón de búsqueda tiene forma de cono y puede ser útil para localizar con precisión un objetivo. Las bobinas concéntricas tienden a ser más ruidosas en terrenos altamente mineralizados y requieren más vueltas de barrido para una cobertura completa del terreno.
Bobina doble d
Las bobinas doble D son las bobinas preferidas para la mayoría de las detecciones. Dan una señal con forma de cuchilla o cincel que cubre el suelo de manera más uniforme y una vez que el operador se acostumbra a la señal, la localización precisa puede ser muy precisa. Las bobinas de doble D también se prefieren por su capacidad superior de balanceo del suelo.
Bobina monoloop
Las bobinas de Monoloop tienen un devanado de cable alrededor de la circunferencia de la bobina, que se utiliza tanto para transmitir como para recibir. El patrón de señal de la bobina Monoloop es en forma de cono, lo que requiere más superposición. En terrenos muy fuertemente mineralizados pueden ser más difíciles de equilibrar, sin embargo, tienden a proporcionar una profundidad ligeramente mejor que las bobinas Double-D.
La suciedad, el polvo y la humedad pueden quedar atrapados dentro de la placa de deslizamiento, lo que produce señales falsas y un rendimiento deficiente. Para mantener el máximo rendimiento de su detector Minelab, se recomienda limpiar la placa de protección con bastante frecuencia.
Consulte la guía de selección de bobinas para encontrar la bobina más adecuada para sus necesidades de detección.
Las especificaciones de los auriculares no son realmente críticas en un detector de metales, ya que sus circuitos de audio no producen sonido de calidad Hi-Fi. Por ejemplo, nuestro rango de salida de la frecuencia de los detectores es de alrededor de 75 -1200Hz.
Nuestros circuitos de audio manejarán la mayoría de los auriculares de 16 a 100 + ohmios.
La optimización de audio también es muy subjetiva ya que todos escuchan de manera diferente.
Nos esforzamos por no confundir a nuestros clientes con especificaciones técnicas innecesarias porque en realidad no existe una manera honesta de determinar qué audífonos son mejores para usted, aparte de probarlos.
Si tiene un detector con tonos de audio ajustables, como un CTX 3030, también le recomendamos que dedique algo de tiempo para asegurarse de que los tonos de detección estén optimizados para sus necesidades auditivas.
There is no specific answer to this question as it depends on the target size, orientation, metallic content, ground minerals and conductivity, electrical and ambient noise in the area and etc.
However we commonly hear of GPX Series detectors finding large gold nuggets at 3 and sometimes 4 feet deep, and CTX 3030s finding coins and rings at over 12 inches.
Solo si se vuelve defectuoso.
En algunos detectores no necesita balance de tierra en absoluto. En otros, se recomienda a los usuarios nuevos en la detección que utilicen la función de seguimiento del balance de tierra.
En Rastreo, el detector automáticamente equilibrará el terreno para usted y permanecerá en equilibrio incluso si los minerales del suelo varían. En los detectores de balance de tierra manuales como el X-TERRA 305 y el X-TERRA 505, debe realizar el balance de tierra al comienzo de cada búsqueda y rebalancearlo periódicamente según sea necesario. Siempre balance de tierra en el suelo limpio, lejos de objetos metálicos.
Las cadenas de oro son muy difíciles de detectar, particularmente las cadenas muy finas. Cada enlace de una cadena puede ser muy pequeño y el detector ve cada enlace como un objetivo separado, por lo que puede perderse fácilmente. Es más probable que detecte el cierre real o cualquier colgante que aún pueda estar en la cadena, ya que estos son mucho más grandes que los eslabones individuales. Los detectores de alta frecuencia, como el Eureka Gold o un X-TERRA 705 con una bobina de 18,75 kHz en modo de prospección, a menudo detectan cadenas finas mejor que la mayoría de los detectores de monedas.
La coca es carbono y, como tal, puede ser bastante conductiva, como una moneda.
El GPZ 7000 es nuestro detector más profundo en todas las condiciones del terreno y puede detectarse incluso a través de rocas altamente mineralizadas.
No, las características del cable se adaptan a los devanados de bobina en la fabricación, por lo que la extensión del cable reducirá el rendimiento de la bobina.
Las bobinas más pequeñas son mejores para los sitios de mala calidad, ya que reducen los casos de detección de múltiples objetivos a la vez. Las bobinas concéntricas son generalmente mejores que las bobinas de doble D por esta misma razón.
Consulte la guía de selección de bobinas para encontrar la bobina más adecuada para sus necesidades de detección.
Los detectores de metales captan señales electromagnéticas de objetos metálicos subterráneos. También se pueden recibir señales similares a través del aire de otras fuentes electromagnéticas, como líneas eléctricas, transmisores de radio, generadores, etc.
Si su detector es ruidoso cuando está detectando, pero se detiene cuando deja de barrer la bobina, entonces está recibiendo señales del suelo mineralizado. Realizar un balance de tierra y seguir detectando.
Solo la serie GPX: si aún es ruidoso, es posible que deba probar una selección alternativa de suelo / tiempo. Todos los demás detectores: si aún es ruidoso, tendría que reducir su sensibilidad al nivel más alto de sensibilidad estable.
La única forma garantizada de obtener todos los buenos objetivos posibles es no usar la discriminación. Sin embargo, cavar cada objetivo puede desperdiciar mucho tiempo. Los patrones de discriminación siempre son un compromiso entre cavar la mayoría de los objetivos buenos e ignorar la mayoría de los objetivos basura.
Esto puede ser causado por una serie de razones:
Por lo general, porque está levantando la bobina al final de su swing. Barrer siempre lento, bajo y nivelado durante todo el swing.
Zero Voltage Transmission (ZVT) technology creates ultra‑constant high-power opposite polarity magnetic fields.
ZVT provides users with superior ground balance to enhance detector stability in mineralised soils and will detect gold nuggets at extreme depths that exceed all current competitor products.
The GPZ 7000 is our best performer on the medium to larger nuggets, even in highly mineralised or variable ground. It retains superior depth capabilities compared to any other detector while still providing good sensitivity to smaller, shallower targets.
The GPZ 7000 detector has Minelab branded, and aftermarket coils available for purchase. Minelab branded coils are available from Minelab certified dealerships. You can purchase the 14” or 19” Super-D coils.
NuggetFinder coil have released 2 Minelab approved aftermarket coils. A 12” round Super-D coil and a 17” elliptical Super-D coil which can be purchased by NuggetFinder stockists.
No, the GPZ 7000 does not have any discrimination capability.
The Difficult Ground Type setting is the default setting and is recommended as gold is usually found in areas with highly mineralised soils.
The Normal Ground Type setting will provide the greatest detection depth but can only be used in “quiet” soils where there are lower levels of mineralisation in the soil.
If the detector is running unstable or noisy when using a “Normal” ground type you should switch to “Difficult”.
The Severe Ground Type will provide the lowest detection depth and should only be used when detecting in areas with extremely high levels of mineralisation. This setting should only be used in areas where you need to raise the coil above the ground when using the “Difficult” Ground Type setting.
When ground balancing, the yellow ferrite ring artificially adds additional data to help the GPZ 7000 improve the ground balance accuracy. This should always be used to ensure smooth operation. Sweep the coil over the yellow ferrite ring in a figure 8 motion ground balancing, ensuring that you sweep over the yellow ferrite ring with each figure 8 movement.
When balanced correctly you should hear a smooth audio tone when sweeping the coil over the yellow ferrite ring.
When ground balancing the GPZ 7000 a swinging or figure-8 movement is recommended as the GPZ 7000 constantly monitors the changes in the soil. Sweeping the coil over as much ground as possible ensuring that you sweep over the yellow ferrite ring with each swing/figure-8 motion when ground balancing allows the detector to gain as much information as possible about the local ground conditions which provides a superior ground balance.
Wireless audio is susceptible to audio dropouts when the signal is blocked. Audio dropouts can be reduced by ensuring a direct line of sight between the WM12 and the detector. It is best to wear the WM12 as close as possible to the detector. This minimises the path to the wireless transmitter and makes it less likely that the operator's body will block the signal path between the WM12 and the detector.
The GPZ 7000 will operate for approximately 8 hours when commencing with a fully charged battery. Charging the battery will typically take 5 – 6 hours.
The WM12 wireless module will operate for approximately 12 hours on a fully charged battery and takes around 12 hours to charge when charging via the BC10 charger.
Yes, the GPZ 7000 can be charged from a nominal 24V battery system. The BC10 charger can will function between 11 – 30 volts DC.
You can also use the supplied 240V AC plug-pack if your vehicle is fitted with an inverter.
No, Minelab currently has no plans to release a replaceable cell or alkaline battery pack.
There are 2 USB cables supplied in the box with your GPZ 7000. The USB-A to Mini-USB cable is used for charging the WM12 wireless module.
The USB-A to USB-B is used for software updates and is plugged into the rear of the screen pod and a PC.
On the rear of the screen pod is a USB-B port that can be used if a software upgrade is released. Check the downloads section of the GPZ 7000 page on our website for updates.
La tecnología GeoSense-PI ™ analiza y responde a las señales terrestres con gran claridad y precisión, para que pueda detectar en entornos difíciles que antes se consideraban indetectables. Suprime rápidamente las señales no deseadas a través de tres sistemas de retroalimentación superpuestos para una detección ultrarrápida incluso de las piezas de oro más pequeñas.
El GPX 6000 es nuestro mejor intérprete en las pepitas más pequeñas y abundantes, incluso en suelos altamente mineralizados o variables. Conserva una profundidad excelente, justo detrás del GPZ 7000 en pepitas más grandes y profundas.
Las bobinas GPX 6000 son una nueva gama de bobinas ligeras y de alto rendimiento que no son compatibles con los detectores anteriores de la serie GPX.
La bobina doble D de 14 "en el GPX 6000 sólo se puede utilizar para la cancelación de EMI o la cancelación de señales de suelo conductivo. No es capaz de discriminación ferrosa.
The following Minelab coils are currently available to operate with the GPX 6000:
Minelab approved aftermarket coils are available from Coiltek and NuggetFinder.
El primer devanado del cable de la bobina desde la bobina siempre debe pasar por encima del eje. Luego, el cable en espiral debe enrollarse estrechamente alrededor del eje y sujetarse en su lugar con las dos correas de velcro. Debe dejar suficiente espacio para que la bobina pueda moverse libremente al detectar.
El GPX 6000 no rastrea el componente de ferrita del suelo. GeoSense-PI utiliza otras técnicas para eliminar la respuesta 'X' que es invisible para el operador.
No necesita una ferrita amarilla para balancear el suelo del GPX 6000.
El tono de umbral se puede activar y desactivar en cualquier ajuste de sensibilidad con una pulsación larga del botón Tipo de suelo.
Tenga en cuenta que el tono de umbral se activa en los rangos de sensibilidad manual y se desactiva en los rangos de sensibilidad automática. La próxima vez que encienda el GPX 6000, el tono de umbral volverá a su valor predeterminado.
La configuración de Tipo de suelo difícil se utiliza mejor en suelos más fuertemente mineralizados, particularmente con rocas calientes o suelos muy variables.
La configuración de Tipo de suelo normal tiene la mayor profundidad en pepitas más grandes; se utiliza mejor siempre que sea posible y siempre en suelos con niveles de mineralización más bajos o suelos menos variables. El tipo de suelo normal puede recoger rocas calientes como objetivo. Si las rocas calientes no se pueden equilibrar en el suelo, deberá utilizar el ajuste Tipo de suelo difícil.
The GPX 6000 with GeoSense-PI is continually tracking the ground, so either technique would work. Minelab recommends pumping the GPX 6000 up and down above the ground with the Quick-Trak button depressed to achieve the fastest Ground Balance.
La tierra conductora no tiene que estar asociada con la sal visible. Por ejemplo, las lluvias recientes pueden hacer que el suelo sea más conductivo y aumentar la respuesta del suelo conductivo no deseado.
El audio inalámbrico es susceptible a pérdidas de audio cuando la señal está bloqueada. Las pérdidas de audio se pueden reducir asegurando una línea de visión directa entre los auriculares y el detector. Es mejor usar los auriculares con los controles Bluetooth más cercanos al detector. Esto minimiza la ruta al transmisor Bluetooth y hace menos probable que el cuerpo del operador bloquee la ruta de la señal entre los auriculares y el detector.
El GPX 6000 funcionará durante aproximadamente 8 horas cuando comience con una batería completamente cargada. La carga de la batería suele tardar entre 5 y 6 horas.
Los auriculares ML 100 funcionarán durante aproximadamente 24 horas con una batería completamente cargada y tardarán unas 3,5 horas en cargarse.
La batería GPX 6000 solo debe cargarse desde un sistema de batería de automóvil de 12 V nominales cuando se carga desde un vehículo.
Minelab actualmente no tiene planes de lanzar una batería reemplazable o un paquete de baterías alcalinas.
El cable USB se utiliza para cargar los auriculares Bluetooth y se utilizaría si hubiera una actualización de software disponible para el GPX 6000.
Detrás de la rejilla del altavoz hay un puerto USB que se puede usar si se lanza una actualización de software. Consulte la sección de descargas de la página de GPX 6000 en nuestro sitio web para obtener actualizaciones.
Nunca puede predecir qué nivel de mineralización del suelo estará presente en una ubicación determinada, por lo que Normal es el momento recomendado para comenzar. Luego, puede dejar que el detector le diga qué sincronización usar barriendo la bobina y escuchando la estabilidad del umbral.
Después de realizar un Auto Tune y Ground Balance, debe comenzar a buscar, y si el detector es demasiado ruidoso o emite señales sobre muchas rocas calientes, entonces el Timing que está usando es demasiado agresivo para el terreno en el que se encuentra. Debe seleccionar otro Timing más cercano al extremo oscuro de la siguiente escala, por ejemplo, Mejorar.
Se sabe que el GPX 5000 sufre interferencias electromagnéticas (EMI), especialmente durante las tormentas. Hay tres razones conocidas para esta interferencia:
En los días malos de EMI, aquí hay algunos consejos que pueden mantener su umbral ronroneando:
Asegúrese de no utilizar una bobina Monoloop con el interruptor Coil Rx en la posición Cancelar.
Las bobinas Monoloop tienen un cable perfectamente redondo.
Las bobinas de doble D tienen un cable más plano debido a los dos núcleos internos.
Ponga el interruptor Coil / Rx en Cancelar. Si tiene una profundidad ligeramente reducida de lo esperado, entonces su bobina es una Doble-D. Si prácticamente no tiene profundidad, entonces tiene una bobina Monoloop.
La función Estabilizador controla el punto en el que comienzan a escucharse ligeras variaciones en el Umbral. Estas variaciones débiles pueden ser ruido ambiental o señales débiles del objetivo. A medida que aumente el control del estabilizador, las señales débiles del objetivo se volverán más fuertes, pero el nivel de ruido también aumentará, lo que puede ocultar potencialmente una señal del objetivo deseable. El estabilizador le permite enmascarar estas variaciones débiles para proporcionar un umbral perfectamente estable, mejorando su capacidad para identificar señales débiles del objetivo.
Es mejor dejar el estabilizador en la posición FP (preajustado de fábrica) hasta que se determinen las condiciones del suelo en la ubicación. Una vez que se ha establecido el nivel de ganancia de Rx para las condiciones locales y se han seleccionado otras configuraciones de audio, el estabilizador se puede usar para ajustar la estabilidad del umbral.
Para encontrar la posición óptima del estabilizador, asegúrese de que la bobina se deslice por el suelo. Un número por debajo del punto en el que el umbral comienza a vibrar, es generalmente la mejor configuración.
Se podría considerar que el efecto del estabilizador tiene un efecto similar al del control de ganancia de Rx. Sin embargo, el estabilizador afecta solo al procesamiento de audio y no cambia la señal de recepción (Rx), por lo que debe usarse como ajuste fino de la etapa final. Después de realizar cualquier ajuste en el estabilizador, si las condiciones del suelo cambian o si desea cambiar las bobinas, es posible que deba restablecer la ganancia de Rx, pero antes de hacerlo, primero devuelva el estabilizador a la configuración predeterminada de fábrica. Esto asegurará que seleccione el nivel de ganancia de Rx más apropiado para adaptarse a las condiciones, y luego podrá realizar un ajuste fino con el estabilizador.
Consejo: al girar el control del estabilizador cerca del mínimo (en sentido contrario a las agujas del reloj), el umbral será muy estable, pero habrá perdido mucha sensibilidad con los objetivos más pequeños. Esta puede ser una característica deseable en ciertos escenarios, como buscar pepitas grandes en un área con mucha basura, o usar GPX 5000 y GPX 4800 para buscar monedas o tesoros.
Sugerencia: Recomendamos que el mejor orden para configurar estos controles sea:
El volumen de destino controla la fuerza de las señales de destino y, con una configuración superior a 8, también aumentará ligeramente el volumen del umbral. Esto es útil para condiciones de mucho viento, para personas que sufren pérdida auditiva o cuando se utilizan altavoces externos. Con el amplificador de audio integrado en el paquete de baterías de iones de litio, puede conectar un altavoz directamente a la batería y establecer un nivel apropiado de amplificación utilizando el volumen objetivo. Tenga en cuenta que al cambiar de auriculares a un altavoz externo, es posible que deba realizar pequeños ajustes en los controles de umbral y límite de volumen.
El volumen objetivo se puede usar como un refuerzo de audio en condiciones silenciosas y también se puede usar para reducir o suavizar las señales de ruido del suelo en suelos altamente mineralizados. Esta es una característica poderosa y funcionará junto con el control del estabilizador, brindándole lo último en capacidad de ajuste fino. Es posible que se requiera un poco de experimentación para encontrar la combinación óptima en diferentes condiciones.
NOTA: Siempre que se requieran ajustes en la ganancia, debido a un cambio de bobina o ubicación, asegúrese de que el volumen objetivo vuelva a la configuración de FP primero. A continuación, puede realizar ajustes para adaptarse a las nuevas condiciones.
The SDC 2300 is our compact and waterproof gold prospecting detector. It uses Multi Period Fast (MPF) Pulse Induction (PI) technology that provides excellent sensitivity when detecting small to medium sized nuggets in highly mineralised or variable ground. The SDC 2300 provides good depth on larger deeper nuggets.
No, there are no other Minelab branded coils available for the SDC 2300. The supplied 8” round coil provides excellent overall performance for the SDC 2300 and keeps the detector waterproof and compact
No, there is no discrimination function available for the SDC 2300.
Having no constant threshold audio emit through the speaker or headphones indicates that the threshold audio is in the OFF or minimum setting.
The threshold volume can be adjusted by pushing the threshold button on the right side of the handle.
There are 9 levels of Threshold audio which are indicated by the LED display. With each press of the threshold button, you will notice the LEDs on the display incrementally move to the right, the threshold audio will also start increasing. When the threshold level is at maximum, pressing the Threshold button will cycle the threshold level back to the OFF or minimum setting.

The SDC 2300 has 2 Audio pitch settings, Low or High. High pitch is the default, to change to the low setting switch the detector off then push and hold the Threshold button while switching the detector on.

The SDC 2300 will remember its previous setting so you will need to push and hold the Threshold button whilst switching the detector on to toggle back to the High pitch setting.
The SDC 2300 is waterproof to 3m (10ft) This is the complete detector including the control box.
Yes, the SDC 2300 has a salt mode in the sensitivity adjustment, however Minelab does not recommend using the SDC 2300 on the beach as the SDC 2300 does not have a discrimination or target ID feature so you will dig a lot of trash.
The salt mode in your SDC 2300 is designed to be used on conductive ground such as salt lakes or wet mineralised soils found in gold fields where a high salt content is apparent. For example, recent rains may make the soil more conductive and increase the unwanted conductive soil response. If the soil is conductive or you are detecting on a salt lake, then adjust the sensitivity dial to a salt setting.

To check the battery level on your SDC 2300 simply push and hold the Noise Cancel button then press and release the Threshold button. The Noise Cancel button can now be released.
An indication of the battery level will be displayed by the LED's for approximately 3 seconds.

The SDC 2300 will operate for approximately 8 hours when commencing with a fully charged Li-Ion battery. Charging the battery will typically take 5 – 6 hours. When using C-Cell Alkaline batteries you will generally have a longer use time (10-14 hours) but this will depend on the quality of the C-Cell batteries you are using.
No, The SDC 2300 battery should only be charged from a nominal 12V car battery system when charging from a vehicle.
The SDC 2300 includes a rechargeable Li-Ion battery pack inside the box. The battery compartment can also accept C-Cell Alkaline batteries or C-Cell NiMH rechargeable batteries. You can see the polarity for the C-Cell batteries on the side of the control box.

No, the software on the SDC 2300 cannot be upgraded.
The GOLD MONSTER 1000 is Minelab’s entry level gold prospecting detector, designed to find the smallest of nuggets in moderately mineralised ground. It retains excellent sensitivity to smaller shallow nuggets and can detect some larger nuggets at depth.
The Gold Chance Indicator at the top of the screen indicates if the target has a ferrous or non-ferrous content. If the indicator is consistently pointing to the right, it is indicating a high non-ferrous content and is likely a non-ferrous metal such as: gold, silver, brass, copper, aluminium, lead, zinc or other alloys that do not have any iron (ferrous) content.

If the indicator is pointing to the left, it is showing a high ferrous content and is likely steel or iron.

Large steel and iron (ferrous) targets can indicate on the right. This happens when the conductive properties of the large ferrous target dominate the signal and mask the magnetic properties of the target.
The GM05 and GM10 are the only compatible coils that can be used with the GOLD MONSTER 1000. The GM05 is included in the box and the GM10 coil can be purchased as an accessory from Minelab dealerships.
There are currently no aftermarket coils available for the GOLD MONSTER 1000.
The first winding of the coil cable from the coil should always go over the shaft. Winding the coil cable over the shaft provides minimal stress on the coil cable which will help avoid damage. The coil cable should then be wound closely around the shaft, allowing enough room for the coil to be able to move freely when detecting.

Press the coil cable into the clip on the rear of the screen pod and then carefully screw the coil connector into the rear of the screen pod.


There are 10 manual and 2 auto sensitivity levels.
Auto is located in position 11 on the sensitivity dial and will be indicated with a black dot in the centre of the sensitivity dial.
When in Auto the detector will function smoothly in most soil types and will continually adjust the detector’s sensitivity level to maintain smooth operation.

Auto + is located in position 12 on the sensitivity dial and will be indicated with a black dot in the centre of the sensitivity dial.
Auto + is a more aggressive sensitivity which provides users with additional sensitivity for extra depth performance. Auto+ should only be used in moderately mineralised soils as this setting may provide more ground noise.

Manual sensitivity adjustments (1 – 10) are for the expert user who has a good understanding of soil mineralisation and electro-magnetic interference (EMI).
Manual sensitivity allows the user to adjust the detector’s performance manually, when you have selected a sensitivity setting in the manual range the detector will not adjust levels like it does in the Auto or Auto+ modes. You may need to keep adjusting the manual sensitivity when in variable or heavily mineralised soil types.

The GOLD MONSTER 1000 is very sensitive, when you wave your hand over the coil the detector can detect the salt in your blood.
When you are retrieving a target, you should always use the supplied plastic scoop to ensure you detect the desired target and not your hand.
Because the GOLD MONSTER 1000 is highly sensitive to salt detection it is not recommended for beach use.
Chattering, or inconsistent audio is generally a sign that the detector is picking up interference from ground mineralisation or electro-magnetic interference (EMI). If you are in Auto +, try adjusting the sensitivity to Auto or a lower manual sensitivity. If lowering the sensitivity doesn’t fix the issue, then you should move away from sources of EMI. (power lines, cellular phone towers, power generators, thunder/electrical storms, etc.)
Random detection beeps can be caused by mineralisation in the soil. The GOLD MONSTER 1000 has an auto-tracking ground balance feature that continually monitors the minerals in the soil and adjusts the detectors’ ground balance. Rapid changes or high levels of mineralisation in the soil can cause the detector to false signal, if this happens, pump the coil up and down (0.5 - 10cm / 0.2 - 4”) over the areas that are giving false signals. This will help ground balance the detector to the mineralisation in the soil.
If the mineralisation level is too high, then lower the sensitivity to compensate for the mineralisation level.
Lifting your coil into the air will amplify any noise that is in the area. Minelab does not suggest doing this as this is not how our products are designed to be used. Lifting the coil slightly into the air is acceptable when performing a Noise Cancel, once the Noise Cancel is complete the coil should always be kept near the surface of the soil to avoid interference.
No, the GOLD MONSTER 1000 does not have any wireless capability. You can plug in any 3.5mm (1/8”) stereo headphones to the rear of the control pod.
The GOLD MONSTER 1000 will operate for approximately 12 hours when commencing with a fully charged Li-Ion battery. Charging the battery will typically take 5 to 6 hours.
No, the GOLD MONSTER 1000 battery should only be charged from a nominal 12V car battery system when charging from a vehicle.
No, the software in the GOLD MONSTER 1000 cannot be upgraded.
El software de protección contra virus en algunas computadoras coloca el correo electrónico de Minelab en un archivo / carpeta de correo no deseado, verifique su carpeta de correo no deseado para este correo electrónico. Si no recibió el correo electrónico, comuníquese con el Centro de servicio autorizado de Minelab más cercano .
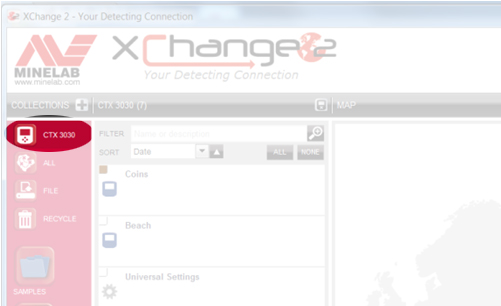
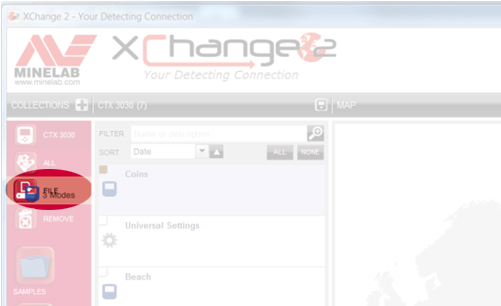
Cuando se instala XChange 2 por primera vez, el icono 'archivo' no aparecerá hasta que el software reconozca que el CTX 3030 está conectado por primera vez. Esta es la única vez que esto sucederá. Después de la conexión inicial, el icono 'ARCHIVO' aparecerá y permanecerá. Ya no necesitará conectar el CTX 3030 para acceder a él.
La configuración de fábrica para GeoTrails está desactivada, por lo que deberá activarlo. Primero encienda el GPS, luego encienda GeoTrails. Desde la pantalla del mapa, mantenga presionado el botón Mapa para acceder a esta opción. Use las flechas para seleccionar 'Ver GeoTrails' y presione el botón Seleccionar.
Mejora los giros en SBAS o el sistema de aumento basado en satélites, que es un término genérico para WAAS utilizado en los EE. UU. Y EGNOS en Europa. Estos sistemas utilizan un satélite geoestacionario para sondear la atmósfera y transmitirlo a su receptor GPS. Funciona bien en los EE. UU., Pero en Europa parece ser mejor para aviones que en tierra. En Australia, recibe señales de un satélite sobre Japón, lo que empeora su reparación. No estoy seguro de cuánto de Europa tiene esto como un problema.
El valor predeterminado para el botón 'Usuario' es controlar la luz de fondo, por lo que si un usuario cambia esto a otra cosa, entonces la luz de fondo se controla en Menú / Opciones / Luz de fondo - ENCENDIDO / APAGADO / HORA
Ya está todo listo y su zona horaria se ha establecido.
Si no conoce su zona horaria UTC, consulte el siguiente enlace: http://www.timeanddate.com/time/map/
En una sesión, si el módulo inalámbrico WM 10 está habilitado y el detector está conectado a él, escuchará los tonos como se espera. Si apaga el WM 10, se "silenciará" el detector. Apague y encienda el detector y podrá escuchar los tonos.
El CTX 3030 tiene una función de compensación del terreno similar a la de los modelos Explorer SE Pro y E-TRAC que funciona muy bien en la mayoría de las condiciones del terreno, por lo que no es necesario equilibrar el CTX 3030 en la mayoría de las condiciones. El balance de tierra solo se debe realizar en 'Terreno extremadamente mineralizado'. No realice balance de tierra en la playa, esto "confundirá" el detector.
Esta es una función estándar, cuando realiza la "Edición de perfil de ID de tono" y selecciona Reproducir tono o Reproducir todo, los tonos no sonarán si el módulo inalámbrico WM 10 está conectado.
Hay 4 configuraciones de volumen diferentes. El CTX 3030 recuerda lo que es cada ajuste. Si baja el volumen mientras usa los auriculares y luego desenchufa los auriculares, el volumen del altavoz externo no habrá cambiado de su configuración anterior.
Antes de colocar el reposabrazos de estilo de bloqueo por torsión en el eje, gire el bloqueo totalmente en sentido contrario a las agujas del reloj. No es necesario girar la cerradura completamente 90 grados para bloquearla. Alrededor de 30 a 45 grados es a menudo suficiente.
Esto fue corregido en una actualización de software. Conecte su detector a XChange 2 y compruebe si hay actualizaciones de software. Siempre recomendamos utilizar la actualización de software más reciente. Si está en la última actualización o si la actualización no corrigió el problema, comuníquese con su Centro de Servicio Autorizado de Minelab regional.
Los modos cambiarán (o se traducirán) SOLAMENTE al cambiar de INGLÉS a otro idioma y no al revés. Si el detector se configura inicialmente en un idioma que no sea el inglés, los modos aparecerán en ese idioma. Pero si cambia el idioma a inglés más tarde, los modos permanecerán en el idioma original.
El Activador cancelará cualquier ajuste que se realice y retrocederá un nivel en el menú.
Si ha estado usando mucho el detector desde la última vez que lo conectó a XChange 2, entonces hay una gran cantidad de datos almacenados. Los datos pueden tardar varios minutos en cargarse. Por favor sea paciente.
Esto podría estar relacionado con el enmascaramiento, la configuración de baja sensibilidad, la sobrecarga de la bobina, etc. Realice un 'Reinicio de fábrica' y vuelva a probar el detector.
Para conectar el módulo inalámbrico WM 10 a su detector:
Si el emparejamiento falla, intente seleccionar otro canal
La ubicación del WM 10 puede ser un problema para la pérdida de la ruta. El cuerpo humano es muy atenuante, por lo que tener el WM 10 escondido en su parte trasera lejos del detector podría causar problemas. Si tiene problemas, coloque el WM 10 en una línea de visión clara hacia el detector para obtener mejores resultados.
Las instantáneas solo se guardan mientras el detector está encendido. Es una característica de diseño que las instantáneas se eliminan cuando se apaga el detector.
Durante su uso inicial del GPS, el detector tardará un tiempo en acumular datos locales. Desde un arranque en frío, el "bloqueo" de dónde se encuentran los satélites y etc. toma algunos minutos, pero puede llevar una hora acumular gran cantidad de datos locales. Estos datos se pueden utilizar para obtener una mejor resolución y el uso del cielo sombreado.
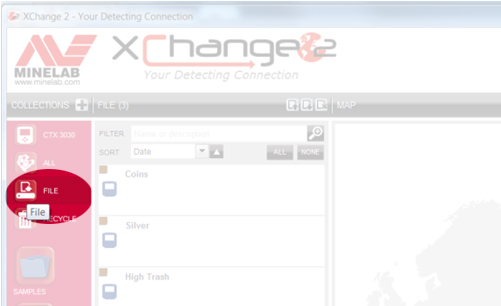
Esto es tan simple como guardar los modos y / o datos que desea como archivo y enviarlos por correo electrónico. Aquí está el procedimiento:
Todos los modos y otros datos de su CTX 3030 se mostrarán en la lista.
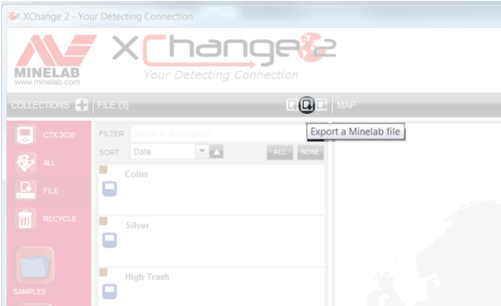
La colección completa de ARCHIVOS se exportará como un solo archivo y se guardará en la carpeta de Descargas de su PC. Luego, puede guardar el archivo en otro lugar o enviarlo por correo electrónico a quien desee.
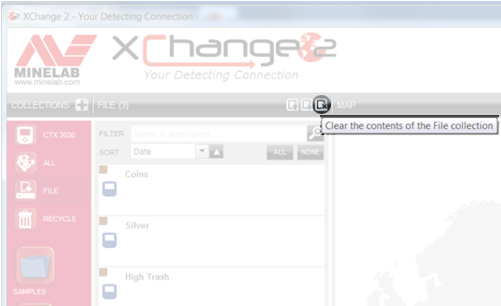
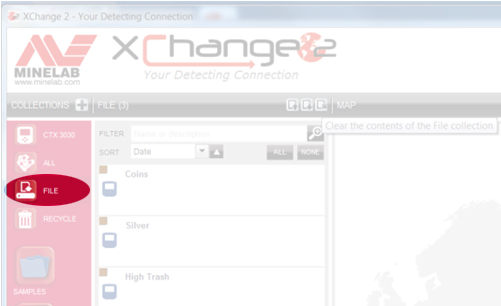
Si recibe un ARCHIVO Minelab de otra persona, simplemente abra XChange 2, seleccione la Colección de ARCHIVOS y luego haga clic en el icono 'Borrar el contenido de su colección de Archivos'.
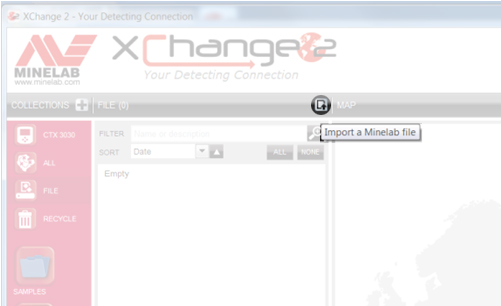
A continuación, haga clic en el icono 'Importar un archivo Minelab'.
Luego haga clic en 'Elegir archivo',
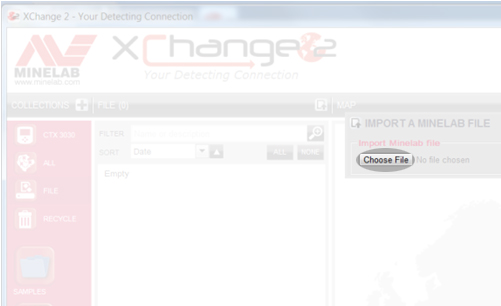
y busque la ubicación del archivo. Resalte el archivo y haga clic en "Abrir" y los elementos que se encuentran dentro de él se mostrarán en la Colección de archivos.
Arrastre y suelte los elementos que desea conservar en una de sus propias Colecciones o directamente en su CTX 3030.
El audio combinado produce diferentes tonos para objetos altamente ferrosos y objetos con diferentes niveles de conductividad. Primero, establezca la línea ferrosa (línea horizontal) en la que desea que los objetivos ferrosos proporcionen la respuesta de audio. Por ejemplo, si lo establece en 21, cualquier objetivo con una lectura ferrosa de 21 o más (número mayor) producirá el tono de audio que programe para los objetivos ferrosos. Por otro lado, si el objetivo tiene una lectura férrea inferior a 21, la respuesta de audio se basará en sus propiedades conductoras. En Audio combinado tiene cuatro 'bandejas' que representan grupos conductores con números conductores que van del 01 al 50. Simplemente mueva las líneas para representar diferentes grupos objetivo y asigne un tono para cada grupo. Por ejemplo, puede establecer el intervalo uno con las líneas en 01 y 14. Cualquier objetivo con un valor ferroso menor que 21, y un valor conductor de 14 o menos caerá en este contenedor y proporcionará el tono de audio que usted asoció a través de la programación .
La bandeja dos, por ejemplo, podría representar objetivos entre 15 y 28. La bandeja tres podría representar objetivos del 29 al 40 y la bandeja cuatro podría ser el resto de objetivos conductores con valores de CO de 41 a 50. Con los números utilizados en estos ejemplos, si pasó por encima de un objetivo con un valor de FE de 12 y un valor de CO de 44, proporcionaría el tono conductor que asignó a la bandeja conductora cuatro. Si pasara por encima de un objetivo con una ID de 11 a 22, proporcionaría el tono asignado a la bandeja conductora dos. Nuevamente, el usuario puede cambiar el tamaño y asignar tonos a cada grupo objetivo (bin). Para aquellos de ustedes que disfrutaron de la caza en Two Tone Ferrous con el E-TRAC, esto lo lleva un paso más, permitiéndole ajustar la línea FE y dividir los objetivos de CO en cuatro grupos separados.
El oro puede identificarse en cualquier lugar en el rango de 10-09 a 13-30, y posiblemente fuera de este rango. A veces, la lectura conductiva puede ser muy baja, como 02, por lo que para mejorar sus posibilidades realmente tiene que cavar todo, incluso papel de aluminio y lengüetas de tiro.
En cuanto a la configuración, el modo de playa estándar es bastante adecuado. Una cosa que puede hacer es cambiar el perfil de ID de tono a Ferrous 35. Lo que esto hace es que hará que las joyas de baja conductividad produzcan un tono más alto que el perfil de conductividad, lo que hace que sea más fácil de reconocer. También puede seleccionar Combinar y personalizar los tonos para adaptarlos a sus preferencias personales.
Para playas de agua salada, se recomienda Sensibilidad manual, a menos que sus playas tengan altos niveles de mineralización magnética. Si su unidad está funcionando bien y estable en Sensitivity 18, intente empujarla un poco más. En situaciones donde realmente esté detectando en el agua salada, active la configuración de agua de mar.
La otra cosa que hacen algunos peinadores de playa es abrir un poco el patrón de discriminación. Bajando el rechazo ferroso principalmente o simplemente busque en el Patrón 2 (simplemente presione y suelte el botón Detectar). Esto es altamente recomendado en playas con bajos niveles de objetivos de chatarra. En este caso, otra cosa que puede intentar es cambiar la Respuesta de audio a LARGO. Esto puede mejorar su capacidad para escuchar la respuesta de objetivo muy débil que pueden producir las joyas.
Mire el video de instrucción comunitaria aprobado sobre la edición de FindPoints y WayPoints.
Mire el video de instrucción comunitaria aprobado sobre cómo vincular fotos desde su teléfono a FindPoints.
Mire el video de instrucción comunitaria aprobado que incluye Cómo grabar un GeoHunt.
Mire el video de instrucción comunitaria aprobado que incluye Cómo grabar un FindPoint o WayPoint.
Mire el video de instrucción comunitaria aprobado que incluye Cómo habilitar la función GPS.
Mire el video de instrucción comunitaria aprobado que incluye las opciones de la pantalla Activar detección.
Mire el video de instrucción comunitaria aprobado que incluye Activar el panel de ID de objetivo grande.
Mire el video de instrucción comunitaria aprobado que incluye Activar el panel de Sensibilidad.
Mire el video de instrucción comunitaria aprobado que incluye Activar la herramienta de navegación de la pantalla de detección.
Mire el video de instrucción comunitaria aprobado que incluye seleccionar un modo de búsqueda en el CTX 3030.
Mire el video de instrucción comunitaria aprobado que incluye la edición de un modo de búsqueda en el CTX 3030.
Mire el video de instrucción comunitaria aprobado que incluye la transferencia de datos de un CTX 3030 a XChange 2.
Mire el video educativo comunitario aprobado que incluye Crear una nueva colección en XChange 2.
Mire el video de instrucción comunitaria aprobado que incluye Cambiar las preferencias de XChange 2.
Mire el video de instrucción comunitaria aprobado que incluye Ajuste de la configuración universal.
Mire el video de instrucción comunitaria aprobado que incluye Crear un nuevo modo de búsqueda en XChange 2.
No, las bobinas FBS 2 solo se pueden usar en el CTX 3030, mientras que las bobinas FBS solo se pueden usar en los detectores E-TRAC, Safari y Explorer.
Las bobinas cableadas son más confiables para detectores de buceo profundo.
No, 8 x 1.2V es solo 9.6V, y estos detectores requieren 12V para funcionar.
Compruebe que la batería esté completamente cargada. Una batería baja hace que el umbral se vuelva muy alto y la respuesta se vuelve errática.
La sal, la arena y la arena se acumularán en el Excalibur II. Por lo tanto, asegúrese de enjuagarlo con abundante agua fresca después del uso, incluida la cubierta de la bobina, los ejes y el paquete de baterías. No olvide los orificios de ventilación de cada diafragma de los auriculares, ya que deben quedar despejados si se usan para bucear para permitir la ecualización de las orejas.
The Multi-IQ engine in all EQUINOX series is the same, there are however processor enhancements in the EQUINOX 700 and EQUINOX 900 that allow the detector to provide users with better Iron Bias, target separation and discrimination depth.
Park 1 (General/Coins)
Park 1 is optimised for modern coins and larger jewellery with a default discrimination pattern set to reject many common aluminium foil-like targets. Therefore, this is the ideal Profile to start with to learn EQUINOX before experimenting with the other Modes and more specialist settings. Park 1 Multi-IQ processes a lower frequency weighting of the multi-frequency signal, as well as using algorithms that maximise ground balancing for soil to achieve the best signal-to-noise ratio. Hence Park 1 is most suited for general detecting and coin hunting.
Park 2 (Fine jewellery)
Park 2 is ideal for smaller targets in trash-infested (including ferrous trash) locations. It will detect a wider range of targets including low conductor (or higher frequency) targets, e.g. fine jewellery. All non-ferrous targets are accepted by default. Recovery Speed is increased to clearly identify good targets masked by iron trash. Target Tone is set to maximum to provide as much target information as possible via audio. Park 2 Multi-IQ processes a higher frequency weighted multi-frequency signal while ground balancing for soil.
Field 1 (Coins and Artefacts)
Field 1 is for general hunting with high trash rejection. This assists in locating desired targets more easily. The default discrimination pattern is set to reject most coke signals. The first Tone Break is set so that the coke signals will produce the same low tone as ferrous targets. Field 1 Multi-IQ processes a lower frequency weighted multi-frequency signal, as well as using algorithms that maximise ground balancing for soil, to achieve the best signal to noise ratio. Hence being most suited for general detecting and coin hunting.
Field 2 (Fine coins and Artefacts)
Field 2 suits locations with high target and trash densities. It will better detect small hammered coins on their edge or at greater depth. The default discrimination pattern is set to reject most coke signals. Target Tone is set to maximum to enhance audio identification and Recovery Speed is faster. The first Tone Break has been set so that the coke signals will produce the same low tone as ferrous targets. Field 2 Multi-IQ processes a higher frequency weighted multi-frequency signal while ground balancing for soil.
Beach 1
Beach 1 is most useful for detecting in wet or dry beach sand and also in shallow water where conductive salt signals are prevalent. It has good sensitivity to coins and small/large jewellery. Beach 1 reduces the salt signal, while maintaining high transmit power, and still being sensitive to desirable targets. Beach 1 Multi-IQ processes a low frequency weighted multi-frequency signal, and uses special algorithms to maximise ground balancing for salt
Beach 2
Beach 2 gives the best results when either wading or shallow diving with the coil and/or detector fully submerged. In these instances, there is a very strong salt signal present, so Beach 2 has a lower transmit power, which results in much less noise. This profile may also be useful in dry conditions where there are extremely high ground noise levels. Beach 2 Multi-IQ processes a very low weighted multi-frequency combination, using the same algorithms as Beach 1 to maximise ground balancing for salt.
Multi-IQ (EQUINOX 800 & 900 only)
Gold 1
Gold 1 is suitable for searching for small gold nuggets in ‘mild’ ground. Most goldfield locations have a variable level of iron mineralisation that will require an ongoing Ground Balance adjustment, therefore Tracking Ground Balance is the default setting. The audio Threshold Level and Threshold Pitch are optimised for hunting for gold nuggets. Gold 1 Multi-IQ processes a high frequency weighted multi-frequency signal, while ground balancing for mineralised soil.
Gold 2
Gold 2 is best for searching for deeper gold nuggets in ‘difficult’ ground conditions. Gold 2 has a lower Recovery Speed, which will increase detection depth. However, more ground noise in more heavily mineralised grounds may result. Tracking Ground Balance is the default setting. The audio Threshold Level and Threshold Pitch are optimised for hunting for gold nuggets. Gold 2 Multi-IQ processes a high frequency weighted multifrequency signal, while ground balancing for mineralised soil.
EQUINOX 700
• Weight has been decreased to 1.27kg (2.8lb)
• Waterproof to 5m (IP68)
• Three piece collapsible shaft now 144cm - 61cm (56.7" - 24")
• All carbon fibre shafts
• New, easily adjustable armrest
• 119 Target ID Range (-19 to 99)
• 119 discrimination notch segments
• "Depth Pitch" audio option in all modes
• Improved target separation
• Improved ferrous rejection
• Red LCD backlight
• Keypad backlight
• LED flashlight
• Handle vibration target indication
EQUINOX 900
• All above features
• Greater Sensitivity range 1 - 28
• Includes EQX06 6" waterproof DD coil
The new carbon fiber shaft design allows users to pack the detector down to 61cm (24 in) and has a full extension of 144cm (56.7 in)
Depth performance will differ depending on conditions and detector settings. Beach performance is better overall. Enhancements have been made to improve recovery speed, target separation and discrimination depth allowing users to have solid target IDs at better depths. EQUINOX 900 comes with 28 levels of sensitivity allowing more depth where environmental conditions allow the sensitivity to be turned up.
What are the frequency differences between the EQUINOX 600, 700, 800 & 900?
The EQUINOX 600 and 700 offer a choice of 4 single selectable frequencies:
• 4kHz
• 5 kHz
• 10 kHz
• 15 kHz
The EQUINOX 800 and 900 offers the choice of 6 single selectable frequencies:
• 4kHz
• 5 kHz
• 10 kHz
• 15 kHz
• 20 kHz
• 40 kHz
Gold Mode is designed to enhance performance on small gold nuggets in mineralized ground. It does so primarily by using different audio processing so that targets respond both in volume and pitch. The Gold Mode will be of interest to gold prospectors but has less application for other uses.
While the EQUINOX 600 and 700 do not have a dedicated Gold prospecting mode. Multi-IQ is so good in both Park 2 and Field 2, that these profiles are as good, or better, at finding gold nuggets than many dedicated single-frequency gold detectors. Multi-IQ provides very stable ID’s which is great for choosing what targets to dig in a goldfield.
Iron Bias is a setting that lets you choose how you want iron in the ground to sound. If you have a low setting, more of the iron will come through as a good target to dig up. This will also give you the best chance of finding any valuable non-ferrous targets nestled among the iron.
However, if you desire to hear less false audio sounds from the iron in the ground, try increasing the Iron Bias setting.
The Iron Bias in the EQUINOX 700 and EQUINOX 900 has had some changes to improve discrimination depth.
EQUINOX 600 and 800 have the option to choose either FE Iron Bias or F2 Iron Bias. FE Iron Bias will provide control over the target ID response. F2 Iron Bias will provide tone and target ID response adjustment for a wider range of ferrous targets.
Iron Bias in the EQUINOX 700 and EQUINOX 900 is based off the F2 Iron Bias in the EQUINOX 600 and EQUINOX 800 but allows even better overall depth detection and target separation. Because of this there is no F2 option available in the EQUINOX 700 or EQUINOX 900.
Yes, Coiltek Coils manufacture Minelab approved aftermarket coils for the EQUINOX and X-TERRA-PRO detectors.
No, they have different technology requirements and are not compatible. Only Minelab EQX coils are compatible with EQUINOX series detectors.
Having a larger target ID scale allows the detector to provide the user with more information on the target prior to digging it. This allows users to identify more targets individually which will help determine if the target is valuable or trash.
In general, Multi is superior to the single frequencies when using an EQUINOX. However, there may be specialised situations where a particular frequency has a unique advantage. The EQUINOX Series offers users simultaneous Multi-Frequency plus a wide range of single selectable frequencies for specialist situations.
Yes, there is no need to perform a full factory reset. Individual Search Profiles can easily be returned to their factory preset settings. Only the local settings will be reset and any global settings will remain in their last-use state.
Beach Mode automatically senses black sand and reduces the transmit power to ensure that targets can still be detected without overloading occurring. When black sand is sensed, the Beach Overload Indicator will appear on the LCD. When this icon disappears, full transmit power automatically resumes.
Depth Pitch is an audio mode that provides a continuous pitch audio with no threshold tone. It provides separate audio for ferrous and non-ferrous targets with a variable pitch.
Small or deep targets providing a weaker signal will have a lower pitch.
Large or shallow targets providing a stronger signal will have a higher pitch.
EQUINOX 700 and EQUINOX 900 have been designed to handle harsh outdoor environments. Our testing includes drop tests up to 1m, flex and water ingress testing. Both models are IP68 rated and can be submerged up to 5m (16ft)
Middle and Lower shafts can be mixed. They are not identical in size so they may not provide an exact fit. Upper shafts cannot be changed as the physical mounting point of the control pod is different.
Yes. The supplied magnetic USB charge cable can be used on all EQUINOX models, MANTICORE and X-TERRA PRO detectors.
The charge time, from completely flat to 100%, is approximately 4 hours when charged with a high capacity charger (>1.7A @ 5V).
Longevity for all batteries depends on a number of factors that are often controllable to some degree by the user; such as temperature, charge levels when stored, charge cycles etc. The most common cause of reduced life of Li-ION batteries is keeping a fully charged battery at elevated temperatures.
As with all components used in our detectors, we stringently source only modern high quality components from responsible vendors. We do not expect users to experience any battery issues over years of use. Our experience with the CTX 3030 and GPZ 7000 detectors which both use Li-ION batteries is that the vast majority of users have never needed to purchase a replacement battery.
• Avoid charging or using in extreme temperatures.
• Avoid rapid extreme temperature swings.
• Use only Minelab or Minelab recommended USB chargers and avoid so-called ultrafast chargers from third-parties that claim to fully charge Li-ION batteries in less than one hour.
• Before storing the detector for prolonged periods, the battery should be charged to approximately 50-60%. On the EQUINOX Battery Status Indicator, 2-bars is the optimum charge for prolonged storage. Maintaining the 2-bar charge periodically during extended storage is also advisable. Extended storage in temperatures less than 30oC (86’F) will also minimize degradation to Li-ION battery life
Use only reputable and certified USB Chargers when charging the EQUINOX battery as detailed below:
Typical runtime, from a full charge using wired headphones, is approximately 12 hours. The EQUINOX Series detectors can also be powered directly from any USB Power Bank that supports 0.5A or 2A (@ 5V) output capability. This effectively gives a continuous runtime only limited by the power banks being used.
The EQUINOX detectors support charging from devices that comply to the USB 2.0 standard. QuickCharge™ is a proprietary standard develop by Qualcomm that uses a higher voltage and is not compatible with EQUINOX detectors.
The Li-ION battery contained in the handle is replaceable and covered under warranty for a period of 1 year (12 months) from the date of purchase. Minelab recommends using an Authorised Service Centre to avoid potentially damaging the waterproof seal and voiding the detector warranty.
*EQUINOX 600 and EQUINOX 800 batteries are not compatible with the EQUINOX 700 or EQUINOX 900.
Yes, when detecting on land, without any limitations. However, the detector must not be used underwater whilst charging or when connected to a power bank.
Yes. If the detector is being used, when powered by a USB power bank, the battery may charge at a slower rate if there is enough spare capacity in the power bank.
Yes. Connecting the WM 08 to a power bank will allow you to continue to use it even if the battery is low/flat. The power bank will charge the WM 08, which will continue operating as normal.
*Please note that the WM08 is not compatible with the EQUINOX 700 OR EQUINOX 900
No. They are separate wireless technologies and only one can be used at any one time.
*Please note that the WM08 and Bluetooth headphones are not compatible with the EQUINOX 700 OR EQUINOX 900
Re-pairing will be required if a different wireless device has been connected to the Equinox 600 or Equinox 800 (e.g. WM 08), or following a detector factory reset.
AUDIO
Bluetooth® Hearing Aids are largely intended to allow the wearer to intentionally connect to other Bluetooth® compatible devices, such as phones and audio streams. They enable the wearer to stream audio on-the-go without having to remove the hearing aid and insert earbuds.
The EQUINOX 600 and EQUINOX 800 detectors are Bluetooth® compatible devices.
While there are various different types of streaming audio hearing aids available on the market, if the hearing aid supports Bluetooth® A2DP or Bluetooth® aptX-Low Latency™ then it will be compatible with the EQUINOX 600 and EQUINOX 800 detectors.
Pairing with the EQUINOX 600 or EQUINOX 800 is achieved by pressing and holding the Wireless button on the side of the Control Unit for 5 seconds.
While pairing is being performed the Wireless icon on the LCD will flash rapidly for 15 seconds. After 15 seconds the Bluetooth® icon will start flashing on the LCD to indicate a Bluetooth device is being paired.
The initial pairing may take up to 5 minutes. During the pairing process the user should not press the Wireless button as this will stop the pairing process.
Once paired, the EQUINOX 600 or EQUINOX 800 will display a solid Bluetooth® icon on the top right of the LCD. If the hearing aid is aptX-Low Latency™ Bluetooth compatible the ‘+’ icon will also be displayed.
Consult your Hearing Aid User Manual for additional pairing instructions specific to your hearing aid.
*Please note that EQUINOX 700 and EQUINOX 900 are not currently compatible with hearing aids.
Yes, the Equinox 600 can still pair to Bluetooth A2DP or Bluetooth aptX-Low Latency headphones.
Yes. It is good practice to wash the detector with clean fresh water after detecting in water or on the beach. Never use abrasives or solvents to clean the detector.
Whenever washing or using your detector underwater always ensure that the plastic bung on the rear of the control pod is firmly screwed into the headphone jack.
No. It is not necessary to lubricate or grease any part of the detector, including the waterproof seals. Using any petroleum-based grease will damage the waterproof seals and void the warranty.
If deep wading or fully submerged, we recommend using only Minelab Waterproof EQUINOX Headphones. These have a specially engineered connector that forms a waterproof seal when used with the EQUINOX. These headphones are available as an accessory from your local Minelab authorised dealership (Part Number: 3011-0372)
VANQUISH depth performance is similar but not quite as deep as the EQUINOX. However, EQUINOX detectors are more configurable for varying conditions.
Minelab does not publish the exact frequencies of Multi-IQ technology used in the VANQUISH Series. These frequencies are similar to the Multi-IQ mode in the EQUINOX Series.
The VANQUISH Series detectors only use Multi-IQ (simultaneous multi-frequency) technology.
Target IDs on VANQUISH are the same as the Target IDs on EQUINOX.
Recovery speed varies depending on the mode selected.
The Custom mode is programmable. If you program custom mode, it will adopt the recovery speed from the mode you program it to, e.g. coin mode = fast recovery speed, jewellery = medium recovery speed, relic = slow recovery speed.
When the detector is switched off, discrimination patterns in coin, jewellery & relic modes are all reset. Custom mode will keep its saved discrimination pattern.
There are three coils available for VANQUISH. These are:
The VANQUISH Series requires x4 AA batteries and is compatible with both rechargeable and non-rechargeable batteries. The battery level indicator shows the current battery level. Lift the battery cover off the control box to replace the batteries.
The VANQUISH 540 and 540 Pro-Pack come with x4 AA NiMH rechargeable cells and a charger. The VANQUISH 340 and 440 can also operate with rechargeable batteries. Minelab recommends only NiMH rechargeable batteries or non-rechargeable AA alkaline batteries. Batteries rated between 1.2v – 1.5v are acceptable. If the battery has a voltage higher than 1.5v, it can damage the detector.
AA rechargeable NiMH batteries provide a run-time of approximately 11 hours using factory default settings.
Non-rechargeable, high-quality AA alkaline batteries provide a run-time of approximately 10 hours.
No. VANQUISH coils cannot be used on EQUINOX, and EQUINOX coils cannot be used on VANQUISH.
The VANQUISH control box is not submersible. The coils are fully waterproof up to 1 m (3 ft).
The temperature specification for the VANQUISH Series is -10C – 40 C (14F – 104 F). The coil is waterproof to 1 m (3 ft), but the control pod cannot be submerged.
No. Pitch or tone breakpoints cannot be adjusted on the VANQUISH Series.
The VANQUISH 540 has a red backlight for detecting in low light situations. The backlight is 'Off' by default at each start-up to reduce battery consumption.
The Multi-IQ technology used in VANQUISH allows the detector to provide stable and reliable target IDs in light of medium mineralised soils found in beaches or parks. As a result, there is no ground balance function available in the VANQUISH Series.
Multi-IQ technology allows VANQUISH to operate on wet beach sand and salt water with much higher performance than a single frequency VLF detector.
VANQUISH 540 can operate with Bluetooth V4.2 or later and Bluetooth aptX Low Latency headphones. VANQUISH 340 & 440 do not have wireless capability.
Yes. Software updates can be found on the Minelab website on the VANQUISH product page 'downloads' section.
VANQUISH Series detectors are under warranty for three years (36 months) from the Date of Purchase. Detailed product warranty information can be found under SUPPORT at minelab.com.
Including battery weight, the VANQUISH 340 and 440 weigh 1.2 kg (2.6 lbs), whereas VANQUISH 540 weighs 1.3 kg (2.9 lbs), as it includes the larger V12 coil.
VANQUISH 540 Pro-Pack contains the same VANQUISH 540 detector but includes the smaller V8 coil and the ML80 Bluetooth aptX Low Latency wireless headphones.
Después de apagar el detector, espere al menos 2 s antes de intentar reiniciar el detector.
La configuración de Iron Bias es la misma en todos los modos en todos los detectores VANQUISH.
Nota: VANQUISH 540 tiene un sesgo de hierro ajustable que tiene una respuesta de sesgo de hierro similar al EQUINOX.
PRO-SWITCH technology is a single frequency VLF technology that allows the user to switch transmit frequencies at the touch of a button to optimise performance.
Changing frequency gives detectorists the ability to adjust frequencies to move away from noise or optimise detection ability when hunting for specific metal targets.
Park and Field modes have 5kHz, 10kHz and 15kHz selectable frequencies. Beach modes have an 8kHz single frequency for high salt mineralisation.
MULTI-IQ will provide superior results when compared to PRO-SWITCH. There may be situations where the PRO-SWITCH technology can perform equally as well as MULTI-IQ. This will depend on how the user has optimised the detector settings.
Multi-IQ will provide maximum performance in all situations as the internal processor does all the hard work. PRO-SWITCH relies on the user to ensure the detector is set to its optimal performance capability.
VANQUISH detectors with MULTI-IQ are a switch-on and go type detector designed to have excellent performance but still be very easy to use with minimal setting adjustments. This is possible as the MULTI-IQ processor does all the hard work for you.
X-TERRA PRO is a high performing single frequency detector designed for the more committed detectorist looking for a well-priced detector with great performance. Users have the ability to adjust transmit frequency which provides more control allowing detectorists to tune the detection performance when hunting for specific targets. The X-TERRA PRO is waterproof to 5 meters (15 feet) and provides superior performance when compared to any other single frequency detector currently on the market.
Target ID’s on the X-TERRA PRO will generally not be quite as stable as MULTI-IQ target ID’s and MULTI-IQ detectors will generally provide superior performance when in conductive (salty) soils.
The X-TERRA PRO comes with a V12X 12” Elliptical Double-D coil in the box, you can purchase the below accessory coils from your local Minelab dealership. Any coil that is compatible with the EQUINOX detectors is also compatible with the X-TERRA PRO.
10kHz is the best all-round frequency to start detecting with as it provides good depth and sensitivity across a range of different targets.
It is expected when running a lower transmit frequency on the X-TERRA PRO that performance on high conductors containing silver or copper will provide similar depths to MULTI-IQ detectors.
It is expected when running a higher transmit frequency on the X-TERRA PRO that performance on lower conductors containing gold will provide similar depths to MULTI-IQ detectors.
At the beach in salty conditions most single frequency detectors struggle with the mineralisation. The X-TERRA PRO provides unprecedented performance for a single frequency VLF detector in salty conditions.
Yes, there is no need to perform a full factory reset. Individual Search Profiles can easily be returned to their factory preset settings. Only the local settings will be reset and any global settings will remain in their last-use state.
Yes, you can purchase the Minelab ML85 headphones, ML105 headphones or the WM09 wireless module. These are all compatible with the X-TERRA PRO.
There are currently no aftermarket wireless headphones available for the X-TERRA PRO.
The X-TERRA PRO uses a proprietary wireless audio that is not compatible with any current versions of BLUETOOTH. The Minelab ML85 or ML105 headphones and WM09 wireless module are compatible with the X-TERRA PRO and are available from your local authorised Minelab dealership.
Park 1 provides a default 10kHz transmit frequency and is optimised for detecting modern coins and larger jewellery. This is a good mode to learn the X-TERRA PRO before experimenting with other settings.
Park 2 provides a default 15kHz transmit frequency and is optimised for detecting fine jewellery and smaller targets in trash infested areas. Recovery speed in Park 2 is increased to clearly identify good targets masked by iron trash.
Field 1 provides a default 10kHz transmit frequency and is optimised for detecting modern coins and general detecting. It has a high trash rejection which makes it an ideal detect mode for areas containing coke.
Field 2 provides a default 15kHz transmit frequency and is optimised for locations with high target and trash densities. This mode is great for coins on edge or sitting at greater depths. It has a high trash rejection which makes it an ideal detect mode for areas containing coke.
Beach 1 provides a default 8kHz transmit frequency and is optimised for dry and wet sand. Beach 1 mode has a lower recovery speed for better depth across all targets and is good for detecting coins and small to large jewellery.
Beach 2 provides a default 8kHz transmit frequency and is optimised for underwater usage where a very strong salt signal is present. To compensate for the high salt content Beach 2 has a lower transmit power. Beach 2 has a higher recovery speed to aid in saltwater rejection. It can also be used in dry soils that are conductive (salty).
Typical runtime, from a full charge using wired headphones, is approximately 16 hours. The X-TERRA PRO detector can also be powered directly from any USB Power Bank that supports 0.5A or 2A (@ 5V) output capability. This effectively gives a continuous runtime only limited by the capacity of the power bank.
The X-TERRA PRO detector supports charging from devices that comply to the USB 2.0 standard. QuickCharge™ is a proprietary standard develop by Qualcomm that uses a higher voltage and is not compatible with X-TERRA PRO detectors.
The charge time, from completely flat to 100%, is approximately 4 hours when charged with a high capacity charger (>1.7A @ 5V).
Longevity for all batteries depends on a number of factors that are often controllable to some degree by the user; such as temperature, charge levels when stored, charge cycles etc. The most common cause of reduced life of Li-ION batteries is keeping a fully charged battery at elevated temperatures.
As with all components used in our detectors, we stringently source only modern high quality components from responsible vendors. We do not expect users to experience any battery issues over years of use. Our experience with the CTX 3030 and GPZ 7000 detectors which both use Li-ION batteries is that the vast majority of users have never needed to purchase a replacement battery.
Use only reputable and certified USB Chargers when charging the X-TERRA PRO battery as detailed below:
The Li-ION battery contained in the handle is replaceable and covered under warranty for a period of 1 year (12 months) from the date of purchase. Minelab recommends using an Authorised Service Centre to avoid potentially damaging the waterproof seal and voiding the detector warranty.
Yes, when detecting on land, without any limitations. However, the detector must not be used underwater whilst charging or when connected to a power bank.
Yes. If the detector is being used, when powered by a USB power bank, the battery may charge at a slower rate if there is enough spare capacity in the power bank.
Yes. It is good practice to wash the detector with clean fresh water after detecting in water or on the beach. Never use abrasives or solvents to clean the detector.
Whenever washing or using your detector underwater always ensure that the plastic bung on the rear of the control pod is firmly screwed into the headphone jack.
No. It is not necessary to lubricate or grease any part of the detector, including the waterproof seals. Using any petroleum-based grease will damage the waterproof seals and void the warranty.
If deep wading or fully submerged, we recommend using only Minelab Waterproof Headphones. These have a specially engineered connector that forms a waterproof seal when used with the X-TERRA PRO. These headphones are available as an accessory (Part Number: 3011-0372)
No, the detection coil that is included with your GO-FIND detector is designed to provide the best performance for that specific model and cannot be changed.
The battery compartment is in the handle of the GO-FIND. On the rear of the handle, you will see a small tab. Gently pull this tab down and then lift the battery compartment lid to access the batteries.
Yes, the GO-FIND series can operate with rechargeable 1.2volt Ni-MH rechargeable batteries. You can only use batteries that have a 1.2 volt or 1.5volt rating. Most AA Lithium batteries have a higher voltage and cannot be used as they exceed the maximum voltage rating for the detector. Using Lithium batteries that exceed the maximum voltage rating can damage the internal electronics of the detector. This type of damage is not covered under warranty.
The detection coil on the GO-FIND series is waterproof to 60cm (2ft) and can be washed. The screen pod should never be washed or submerged in water as it is not waterproof. To clean the screen pod wipe it with a damp cloth.
Yes, the GO-FIND detectors utilise Minelab’s Easy-Trak ground balance technology which automatically senses salt mineralisation in the ground and adjusts the detector to ensure constant smooth usage when detecting in beaches or parks.
Wireless headphones can be used but they cannot be paired directly to your detector. You will need to connect your wireless headphones to your smartphone and then connect your GO-FIND 44 or 66 to your smartphone via the GO-FIND app. GO-FIND 11 or 22 do not have Bluetooth capability and cannot connect to the GO-FIND app or wireless headphones.

In your Android phone Google Play Store & Apple iPhone App Store Search for Minelab GO-FIND
GO-FIND by Minelab Electronics Pty Ltd will be 1st – 2nd in search result.
The Pro App function is FREE for GO-FIND 66 detectors. Download the same GO-FIND App for FREE. When this GO-FIND App is paired with a GO-FIND 66, the App will activate full Pro App functions.
Download the same GO-FIND App for FREE. When this GO-FIND App is paired with a GO-FIND 44, the App will activate basic App functions.
Download the same GO-FIND App for FREE. When this GO-FIND App is paired with a GO-FIND 44, the App will activate basic App functions. It is optional to upgrade your Basic App functions to Pro App functions, just like how it used on a GO-FIND 66. In-app purchase is available for upgrading.
Por primera vez, debe emparejar GO-FIND 44/66 con su dispositivo móvil:
Ver también:
En la aplicación GO-FIND, el botón es ayuda (?) En la esquina inferior derecha. Haga clic para ver la guía de emparejamiento de Bluetooth y la guía de conexión de Bluetooth.
No, después del emparejamiento por primera vez el uso. La próxima vez que lo use, solo deberá presionar brevemente para activar la función Bluetooth.
Ahora puedes usar la aplicación con el detector
Android 11 or later with Bluetooth Lower Energy hardware
iPhone iOS 8.0 or later with Bluetooth Lower Energy hardware
No, the X-TERRA VOYAGER uses different technology to other detectors. You can only use the coil that is supplied in the box with the detector.
The X-TERRA VOYAGER does not have any accessory coils currently available.
The depth gauge will provide an approximate indication of depth and should only be used as a guide as large or small metals will cause the gauge to become inaccurate. A coin sized object will provide the below estimated depths.
1 arrow = 1” (25mm)
2 arrows = 3” (75mm)
3 arrows = 5” (125mm)
4 arrows = 6” (150mm)
5 arrows = >6” (>150mm)
The X-TERRA VOYAGER does not have wireless capability. You can use a Bluetooth wireless transmit module with the detector. These are not available from Minelab and will have to be purchased separately.
All Metal allows the detector to detect all metal types. When in all metal mode there will be no discrimination of any metal types.
Custom provides users the ability to discriminate any of the target group icons at the top of the screen. You simply navigate through to the desired target group and the icon will flash for a few seconds and then it will disappear. All target ID’s in this target group will now be discriminated out.
To detect the discriminated target group simply navigate away from the target group and then navigate back to the desired target group. The icon will flash for a few seconds and then appear. All target ID’s in the target group will now detect again.
Jewelry provides discrimination pattern that ignores most iron/ferrous junk. You will also find coins, relics and other non-ferrous metals. This mode is good for trashy environments.
Learn allows users to detect 1 specific target group. You simply need to wave the desired metal over the detection coil, the detector will then learn this target ID and accept only targets ID’s within that target group.
Typical runtime, when using new high quality 9-volt alkaline batteries is 20 hours.
It is good practice to clean your detector after each use. Only fresh water should be used when cleaning. Never use abrasives or solvents to clean the detector. The detection coil is waterproof and can be washed with the hose. The Screen pod should only be carefully wiped with a clean damp cloth to avoid any water or moisture ingress.
No. It is not necessary to lubricate or grease any part of the detector. Using any petroleum-based grease can damage the plastics and void the warranty.
To disable the audio tones, you simply need to push and hold the "minus" button when powering the PRO-FIND 40 on.
To enable the audio tones, you simply need to push and hold the "plus" button when powering the PRO-FIND 40 on.
To disable the ferrous tones OFF simply push and hold the "minus" button when the PRO-FIND 40 is powered on and then wait for the long beep.
To enable the ferrous tones ON simply push and hold the "plus" button when the PRO-FIND 40 is powered on and then wait for the long beep.
No, the LED flashlight cannot be adjusted.
No, the vibration cannot be toggled ON/OFF.
The Rapid Re-tune feature was designed so that users do not have to power cycle the pin-pointers to re-tune the PRO-FIND to the environment.
To re-tune the PRO-FIND 40 simply short-press the power button when the PRO-FIND 40 is powered on.
At maximum Sensitivity the PRO-FIND 40 can detect targets at greater distances which can be both an advantage and a disadvantage. To pinpoint a target sometimes it’s better to have a less sensitive probe to reduce the search area, so we have given you the ability to adjust it how you see fit. The Sensitivity may also need to be reduced in mineralised or salty soils, so that you are only detecting metal and not the minerals in the ground.
Side detection occurring with the target (or multiple) in the side of the hole. Use the tip of the probe to check around the sides of the hole. Reducing the Sensitivity can also help.
Yes, but be aware that the PRO-FIND 40 won’t have the same sensitivity to very small nuggets as a quality Minelab metal detector. It will be a good aid in target recovery for larger nuggets.
Yes, the PRO-FIND 40 is waterproof to 3 meters (10ft) and can be washed. When washing always use clean fresh water.
If no targets are detected or buttons pressed for 5 minutes, then the PRO-FIND 40 will start a slow constant beep (Lost Alarm) this alarm will sound for 5 minutes and then the PRO-FIND 40 will power off to save battery life.
The battery may be flat or inserted incorrectly. Replace the battery and/or check the battery orientation. If you are still having issues, contact your closest Minelab Service Centre.
The PRO-FIND 40 has a 3rd beep that notifies you that the pin-pointer has calibrated to the environment. This can sometimes take up to 30 seconds to occur depending on environmental conditions. You can short press the power button to perform a rapid re-tune. You should then hear a confirmation beep and the PRO-FIND 40 should now detect metals.
Tips for switching on:
*Calibration usually takes less than a second when the unit has been used recently.*
In highly mineralised soils:
Si no se detectan objetivos o se presionan botones durante unos minutos, entonces la unidad iniciará una alarma perdida, sonará un pitido largo para que pueda encontrar su puntero. Después de unos minutos, el puntero del pasador se apagará solo para preservar la vida útil de la batería.
Esto le permite encontrar la unidad si se deja en el suelo después de cavar un hoyo. El pitido no se produce si está en modo de solo vibración. Después de 5 minutos de pitido lento, la unidad se apagará automáticamente.
La batería puede insertarse de manera incorrecta si se enciende la tapa, pero es difícil apretarla. El plástico con llave evita que las pestañas de la batería toquen los contactos; gire las baterías para arreglar esto.
Después de encender Pro-Find, escuchará 2 pitidos seguidos de un tercer pitido de calibración más corto. Esta calibración a veces puede demorar entre 15 y 20 segundos, espere a que suene este pitido de calibración antes de colocar el Pro-Find cerca de cualquier objeto metálico. Si tiene el Pro-Find cerca del metal cuando lo cambia, no se calibrará y deberá reiniciar el Pro-Find.
Detección lateral que ocurre con el objetivo (o múltiple) en el lado del agujero. Use la punta de la sonda para verificar alrededor de los lados del agujero. Reducir la sensibilidad también puede ayudar.
Sí, pero tenga en cuenta que no tendrá la misma sensibilidad a pepitas muy pequeñas que un detector de oro de Minelab de calidad. Será una buena ayuda en la recuperación de objetivos para pepitas más grandes.
Con una sensibilidad máxima, el PRO-FIND 35 puede detectar objetivos a mayores distancias, lo que puede ser tanto una ventaja como una desventaja. Para identificar un objetivo, a veces es mejor tener una sonda menos sensible para reducir el área de búsqueda, por lo que le hemos dado la posibilidad de ajustarlo como mejor le parezca. Es posible que también sea necesario reducir la sensibilidad en suelos mineralizados o salados, de modo que solo detecte metales y no el suelo.
El PRO-FIND 35 es completamente resistente al agua hasta 3 metros, por lo que puede sumergir el puntero para limpiarlo. Asegúrese de que la tapa de la batería se haya apretado completamente antes de sumergir el puntero.
El PRO-FIND 15 es resistente al agua solamente. Si cubre la ventilación del altavoz con el pulgar, puede lavarlo con agua corriente.
Consejos para encender:
La calibración generalmente toma menos de un segundo cuando la unidad se ha utilizado recientemente
En suelos altamente mineralizados:
Audio encendido y apagado (solo Pro-Find 35):
Tono ferroso encendido y apagado (solo Pro-Find 35):
El CTX 3030, GPZ 7000 y XChange 2 usan SQLite para su almacenamiento de datos. El uso de una herramienta como SQLiteSpy puede ayudar a extraer los archivos. No es necesario instalar SQLiteSpy ya que el archivo extraído se ejecuta directamente.
1. Conecte el detector a una PC y navegue hasta la nueva unidad extraíble que se crea.

2. Abra la unidad.

3. Dentro encontrarás un archivo. Copie esto en una ubicación para usarlo. Este archivo es la base de datos de almacenamiento que debe abrirse.
1. En XChange 2, seleccione los puntos que desea extraer.
2. Arrástrelos a la carpeta "Archivo".

3. Abra la carpeta 'archivo' haciendo clic en ella.
4. Haga clic en el botón 'exportar un archivo Minelab'.

5. El archivo debe estar en su carpeta 'Descargas'.
6. Este archivo descargado está comprimido, por lo que deberá utilizar una herramienta como 7zip para extraer el archivo 'shareData' que contiene.
7. Copie 'shareData' a una ubicación para usarlo. Este archivo está en la base de datos de almacenamiento que debe abrirse.
SQLiteSpy se usa en este ejemplo, pero un proceso similar se aplica a otras herramientas.
1. Abra SQLiteSpy
2. Seleccione 'archivo'> 'Abrir base de datos ...'

3. Navegue hasta la ubicación de la base de datos.
4. Cambie el tipo de archivo a 'Cualquier archivo (*. *)'

5. Seleccione la base de datos y seleccione 'Abrir'
6. A la izquierda, hay varias tablas según el archivo de base de datos utilizado.
a. "findpoint": contiene cada uno de los FindPoints guardados
segundo. "waypoint": contiene cada uno de los WayPoints guardados
C. "punto": contiene cada uno de los puntos utilizados para crear una pista en todas las GeoHunts. Tenga en cuenta que cada GeoHunt se identifica mediante un UUID en la columna "geohunt_fk".
re. "geohunt": contiene el UUID que se utiliza en la tabla de "puntos" para identificar cada una de las geohunts.

7. Supongamos también que desea extraer algunos FindPoints (se usa el mismo procedimiento para los otros puntos también).
8. Haga doble clic en la tabla de "puntos de búsqueda". Esto mostrará todos los FindPoints extraídos.
9. Haga clic en una fila de la tabla y luego presione la tecla "Ctrl + A" para seleccionar todas las filas.
10. Presione la tecla “Ctrl + C” para copiar todos los datos.
11. Abra Excel
12. Pegue los datos en la hoja de cálculo.
13. En algunos archivos de base de datos, la latitud y la longitud deben dividirse entre 10,000,000 para que tengan el formato correcto para su uso.
14. Haz lo que necesites con los puntos de aquí.


